

Finished quilt size: 105cm x 185cm, 41,5″x72″
More images here.
Proceed with caution: This is a tutorial for my first ever quilt top and I am by no means an experienced quilter. So keep that in mind and if you feel that you have way more or better information on something than I do or you see glaring mistakes, please say so. All comments, instructions, corrections and help will be welcomed. :)
Ok, let’s get started. Like many beginning quilters (or crafters of any kind) I started my hobby by purchasing materials. Since I was not very confident about my ability to get the right kind of fabrics to mix and match I bought charm packs and jelly rolls which then hung around my crafting room for months. When I was finally ready to pick up my scissors and start getting my fabric prepared for my very first quilt I ran across a problem. I had all these small pieces of fabric but they weren’t really the right size or shape for any quilt pattern I could find. I knew I wanted to try my hand at coin stacks and log cabins but I just couldn’t find the right kind of pattern. So I made up my mind to make one up myself. And here it is, combining both coin stacks and just a little bit of log cabining.
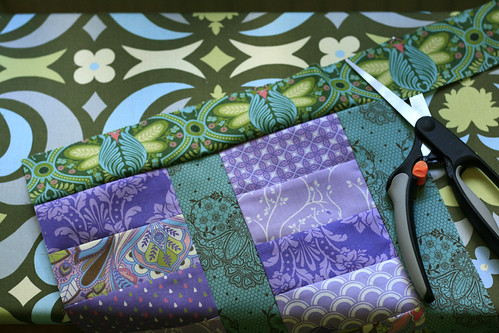
Fabric used: Flutterby by Tula Pink. Some of the images in this tutorial also feature her Full Moon Forest fabrics (I simply adore everything she does). Two charm packs (5″x5″ squares, 40 each, 80 in total) and a Jelly Roll (2,5″x44″/45″ fabric strips, 40 in total). Note: I did not use every single piece of fabric so you can get away with a little less fabric but don’t push your luck. :)
Note 2: All seams are 1/4″.
Cutting your fabric and assembling your blocks:
First, cut all of your charm squares in half. This will give you 160 2,5″x5″ strips. (I suggest that you sew your coin stacks at this point and cut your jelly roll pieces as you start to piece together your blocks.) Arrange the strips in coin stacks of 6 strips each and sew together. Note that each of your 15 blocks will contain 2 coin stacks. Press seam allowances.


Assembled coin stacks
Some of you might note that you will in fact not have enough coin stacks for 15 blocks (and you’ll have some strips left over) but I’ll get to that later.
Next, start assembling you blocks by choosing two jelly roll strips to accompany every two coin stacks. The blocks are assembled in 5 steps:
Step 1. Attach the two coin stacks together with one jelly roll strip (let’s call this fabric A) to create the center of the block. I suggest that you sew the coin stacks to the jelly roll strip first and only then cut the strip to the correct size.

Step 2. Attach the same fabric (fabric A) to the right hand side of your coin stacks by using the same jelly roll strip as for the center. Do NOT cut this strip but leave it hanging. Press your seam allowances to one side at this point (I know it’s a pain but really, the iron is your best friend).

Step 3. Attach the other jelly roll strip you picked for the block (let’s say, fabric B) to the top of the coin stacks. Align the strip with the left raw edge of the coin stacks and sew across both coin stacks and the right edge strip. Cut the strip to the correct length.
Step 4. Attach the bottom edge strip (fabric B). This is a bit trickier than the previous ones so bear with me. First align the raw short edge with the raw edge of the right hand side coin stack where you left the jelly roll strip hanging. Pin in place and mark (red pin in picture) where the righ hand side seam is.


Sew across the bottom of the coin stacks and stop where you marked the seam. Back stitch. Do NOT cut the strip to size yet.
Then let’s deal with the corner. Align the right hand strip and the bottom strip on the wrong side so that they form a continuous edge (see picture). Then sew across the edge to attach the bottom strip to the right hand strip. The seam is a continuation of the seam you made in Step 2.

Step 5. Attach the left hand side strip (fabric B). This step the same as Step 4. Start by aligning the short raw edge of the strip with the raw edge of the bottom strip and continue as with Step 4. When you have finished all seams, cut the bottom and left hand side strips to the correct length. Press all seam allowances.

Repeat this process for all coin stacks. You should now have 13 blocks ready (remember how I told you you wouldn’t have enough coin stacks for 15?). Next you should choose 6 jelly roll strips for the last 3 blocks and put those aside. You will have enough jelly roll strips and leftovers to cut (2,5″x5″) and assemble the 6 more required coin stacks.
Sew together the last 3 blocks, arrange blocks in a pleasing manner and sew the blocks together. Yay! Your quilt top is ready!
There are many wonderful and detailed tutorials on the Internets on how to create a quilt sandwich and how to quilt and bind your quilt together. My quilt is machine quilted “in the ditch” and you can see my quilting lines in the picture below. The tutorials that I used for finishing my quilt are these:


Wow what a great demo thanks awhole lot
Great quilt design – great instructions.
Thanks for the inspiration.
Blessings………..
I’ve finally found the pattern I will use to make my jelly roll/charm quilt…thank you so much for the great tutorial, and congratulations on your first quilt! Hard to believe you made your own pattern on your first quilt; that’s great and I’m sure you are very proud, as you should be! Thanks again!
Love your quilt! I especially love the raindrop fabric!
What a great tutorial!
thanks you for all your hard work!
I love the quilt. I am making my first. Hope I do as well as you. Thanks alot for the help. Joanne
lovely!!
Ihana!
Olet niin taitava.
Cool quilt, I made 3 quilts for the Plant City Strawberry Festival here in Plant City, Florida. All 3 got 2nd Place. I like the way you did the arrangement. You should enter it in a quilt show as a beginner. I did an this is what I got. Very good job
I love your quilt, it´s really beautiful! I have a suggestion for assembling the blocks.
Step 2: When you sew the seam, don´t do it all the way, leave the last (lowest) fabric of the coinstacks unsewn.
That way you can sew all the strips counterclockwise without dealing with the corners and save time and nerves!
So basicly step 4 and 5 change places and lastly step 6 would be sewing the seam in step 2 all the way to the end.
I hope it made sense and you understood!
I really admire your work!
hi i am new to quilting and decided to use a panel for the centre,also i have 30 6×6 squares of fabric which i thought i would use in a 10 inch block. i can fit the blocks with sashing accross the top of the quilt but everything comes unstuck when tried to do the same with the sides, i just cant seem to make them fit. any ideas on this. regards linda w hereford uk
Good Job. Great tutorial and pictures. I have been looking online for any and all help for quilting, and I loved your quilt. How nice of you to share. Thankyou so much!
I’ll be making this next. Thanks for a fabulous tutorial!
Wow – I just love this quilt! Thank you for sharing
LuvLee :-)
Totally lovely — esp. that it it kind of fudge proof. I like that in a quilt. :-)
(esp. since I’m beginning!)
love love love this quilt. I have a jelly roll sitting on my sewing table and you have given me new inspiration thx for sharing
Hi still getting used to my Pfaff quilt expressions 4, when you quilt ‘free motion’ do you use the sensormatic free motion if so how does it go mine just seems to do very long stitches…not sure if its me or the machine?
Thanks Lyn
lynlindsay@tpg.com.au
This is a great tutorial and such a pretty quilt. There are many experienced quilt makers who won’t design their own patterns! :)
I love the way your jellies go around your block, but if anyone wants to make it easier they could…
1) Sew the two coin strips with the jelly strip in the center. Trim off the end
2) Sew a jelly strip to the left and right. Trim off the ends.
3) Then sew a jelly strip to the top and bottom to “seal” in your coin strips.
Gives the quilt a slightly different look but then you don’t have to deal with corners if you’re nervous about them!
This is awesome! I recently purchased some jelly rolls and charm packs to try this quilt out. I’m very impressed! keep up the good work!
[…] https://pikkukettuknits.wordpress.com/two-charm-packs-and-a-jelly-roll-quilt-top-tutorial/ […]
Wow Lyn: That is very inspirational. I am working on a jelly roll quilt and this is but I’m only at the point of sewing my strips together so I believe I will adopt your method and it will give me something to follow. Or get ideas from ….You quilt is very nice and looks cozy. Thanks for sharing your technique and it was great viewing. Medora from Manitoulion Island, Canada.
Beautiful! Love your great explanations and photos.
These fabric patterns are lovely. Thanks for the ideas!
I am teaching my daughteer to sew. I was looking for a project with straight lines. i think this will be great. she make a doll out fit this week. we are practicing. thanks for sharing your project. I may use four wider strips for her. She is 9. Thanks
Check out a 1600 or race quilt. Should be VERY easy for a child to do with guidance from you. Nice straight lines – period.
oops, my daughter
I made this and it got set aside… glad I came across it again so I can quilt it. I thought his was easy and fun to make….
Oh, this is wonderful.
Such a beautiful and still “simple” quilt.
I’ve been wanting to finally make my first quilt for already quite a long time now.
This kindly shared tutorial gives me the needed kick, to finally begin.
I’m going to buy the needed fabric collection as soon as I can, and can’t wait to start.
Thank you so much for sharing this!
♥
I don’t even know the way I finished up here, however I thought this submit used to be great. I do not know who you’re but certainly you are going to a well-known blogger in the event you are not already. Cheers!
You have done a great job, it is a beautiful looking quilt, the colours just pop.)
I’ve been exploring for a little for any high quality articles or blog posts on this sort of area . Exploring in Yahoo I finally stumbled upon this web site. Reading this information So i am happy to show that I have an incredibly good uncanny feeling I found out exactly what I needed. I most surely will make sure to don?t omit this web site and provides it a look regularly.
Very cute!
For your first quilt, it looks beautiful. You are a natural born quilter. What will you quilt next? Can’t wait to see.
“�Two Charm Packs and a Jelly Roll�- Quilt Top tutorial
� Pikku-Kettu Knits and Quilts” seriously got me simply hooked with ur webpage!
I actuallywill certainly wind up being back again considerably more
regularly. Thanks -Susana
Howdy! This is my first visit to your blog! We are a team of
volunteers and starting a new project in a community in the same niche.
Your blog provided us useful information to work on. You have done
a extraordinary job!
First off I want to say great blog! I had a quick question in which
I’d like to ask if you don’t mind. I was curious to know how you center yourself and clear your head prior to writing.
I’ve had trouble clearing my mind in getting my thoughts out. I do take pleasure in writing however it just seems like the first 10 to 15 minutes are generally wasted just trying to figure out how to begin. Any suggestions or tips? Kudos!
First of all I just want to say I think this is a beautiful quilt :-) I like the design v much and can see myself borrowing/tweaking it for one of my own in the future. However, I have a query: At the start of step 5, you say to “attach the left-hand strip (fabric B)” but from the pic it looks like it’s actually fabric A? Am I right or completely confused?
Thanks,
Carryl
i am a new quilter and loved this tutorial
Thanks for finally writing about >�Two Charm Packs and a Jelly Roll�- Quilt Top tutorial | Pikku-Kettu
Knits and Quilts <Liked it!
My spouse and I stumbled over here different
web address and thought I may as well check things out.
I like what I see so i am just following you. Look forward to finding out about your web page for a second
time.
Undeniably imagine that that you stated. Your favourite
justification seemed to be at the internet the easiest thing to
remember of. I say to you, I certainly get annoyed at the same time as other folks think about worries that they plainly
do not recognize about. You controlled to hit the nail upon the
highest and outlined out the whole thing without having side-effects , other people can take a
signal. Will probably be again to get more. Thanks